1. Concept Phase
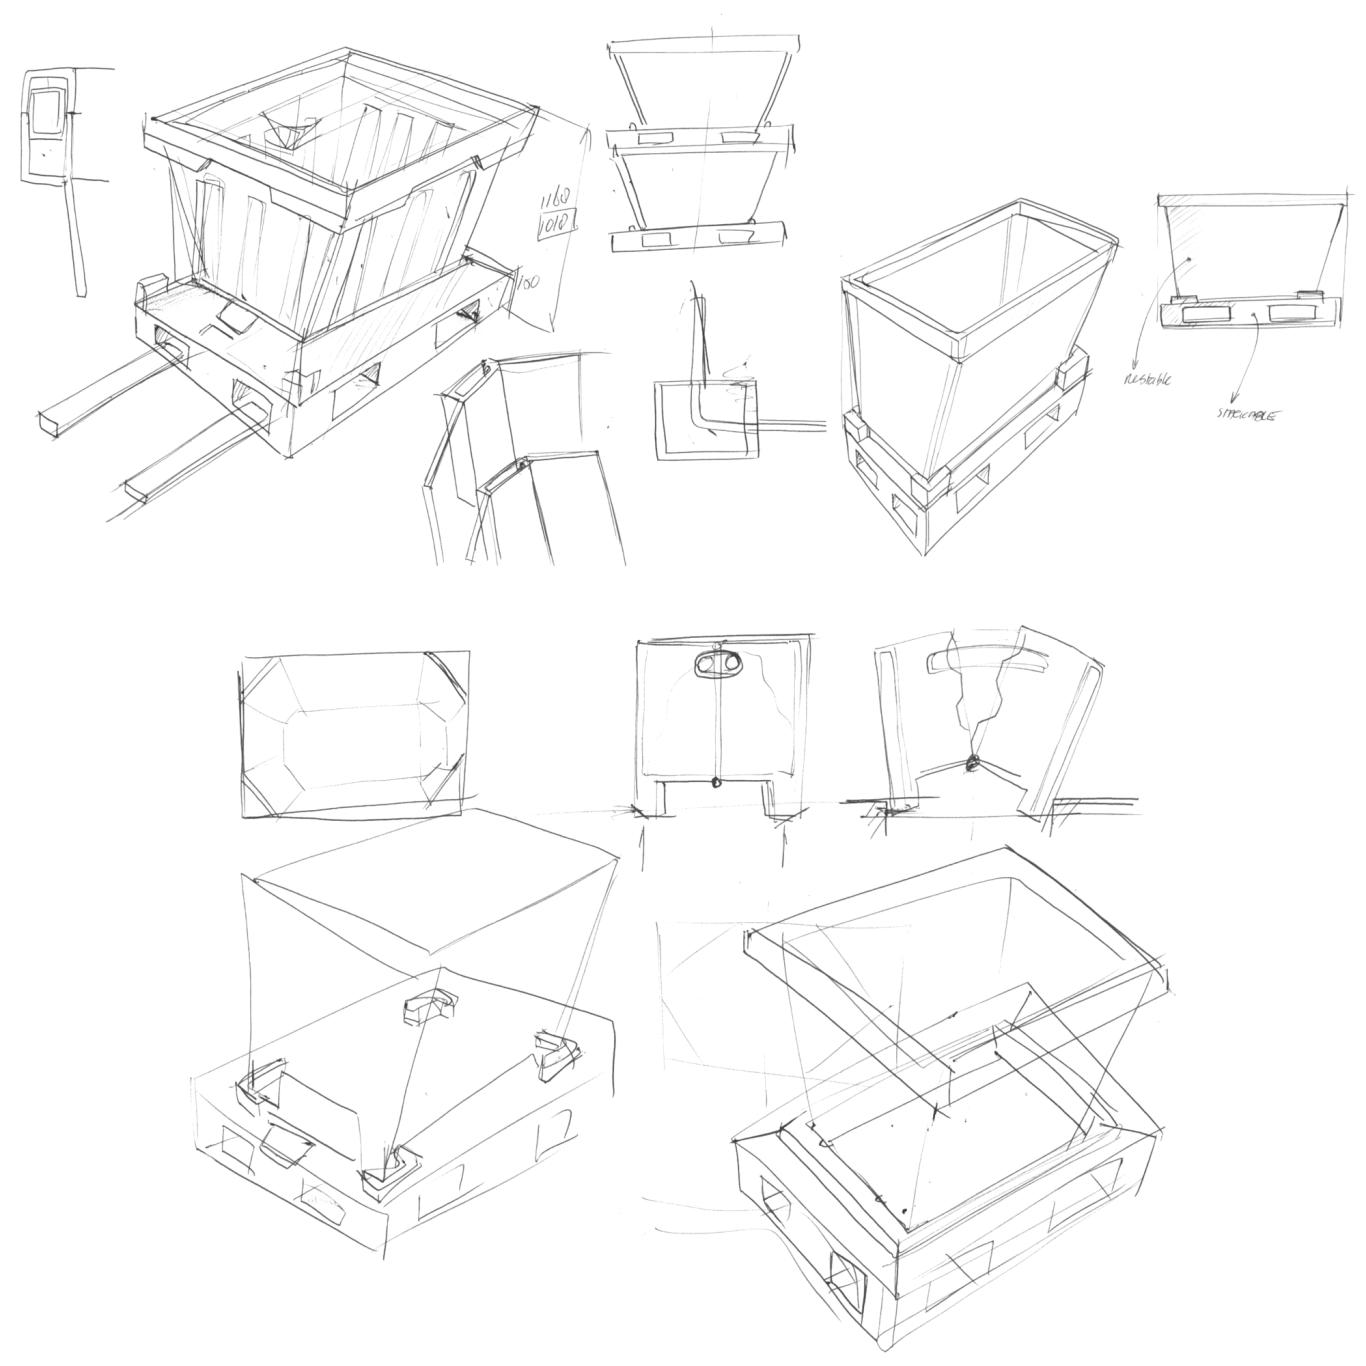
In the beginning of the process the first ideas are generated after input was given of the goal and purpose of the new development. In this phase the requirements do not need to be fixed but only a direction or a vague request can already be enough to start.
Output of this phase mostly will be skectches or early 3D images. CAD work in this phase is then also done to check if a certain principle or idea is feasible.
2. Concept Selection
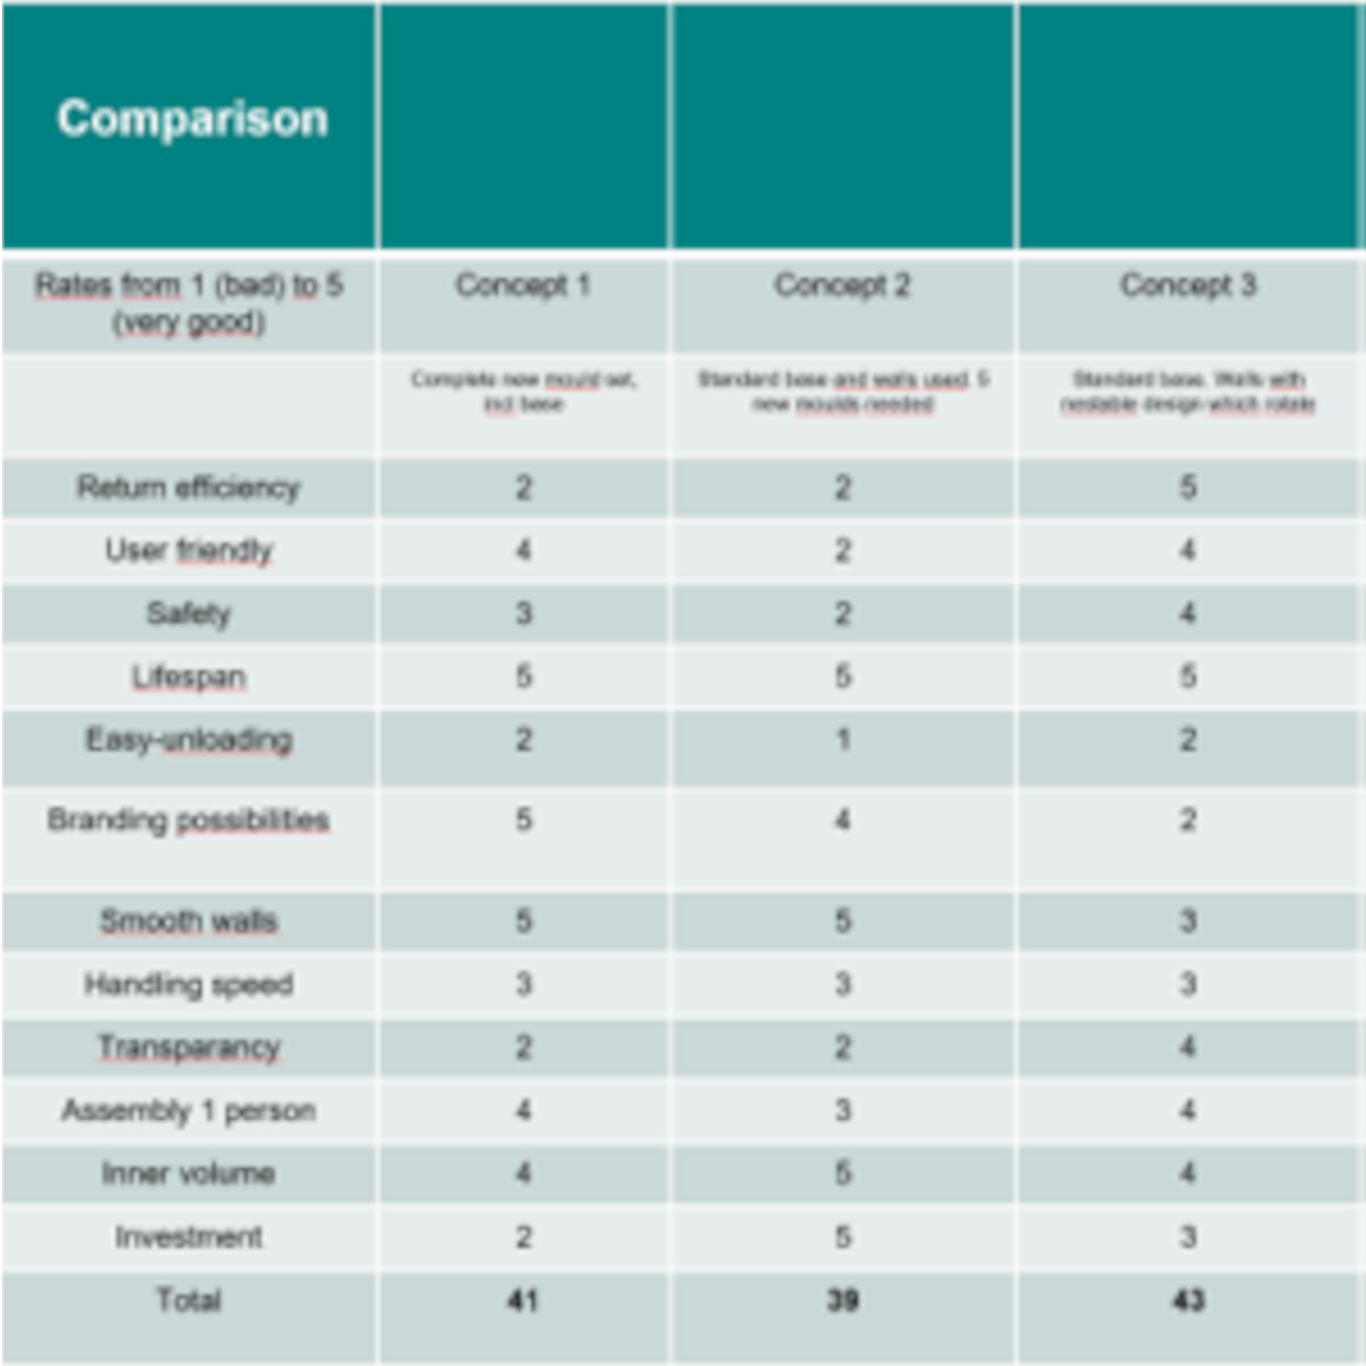
After generating the first concepts and the verifying of the feasibility is done , with the help of the already more elaborated list of requirements, the best 2 or 3 concepts need to be selected. This to avoid making a lot of prototypes which will increase the total development cost a lot.
Selecting the preferred concepts can be done in a natural way ( experience, instinct, gut feeling) but can also be done by using a spreadsheet in which the main characteristics (technically/financially) are mentioned and every concept gets a score on the several important points. The concept(s) with the highest scores will be detailled out to the next stage.
3. Prototyping
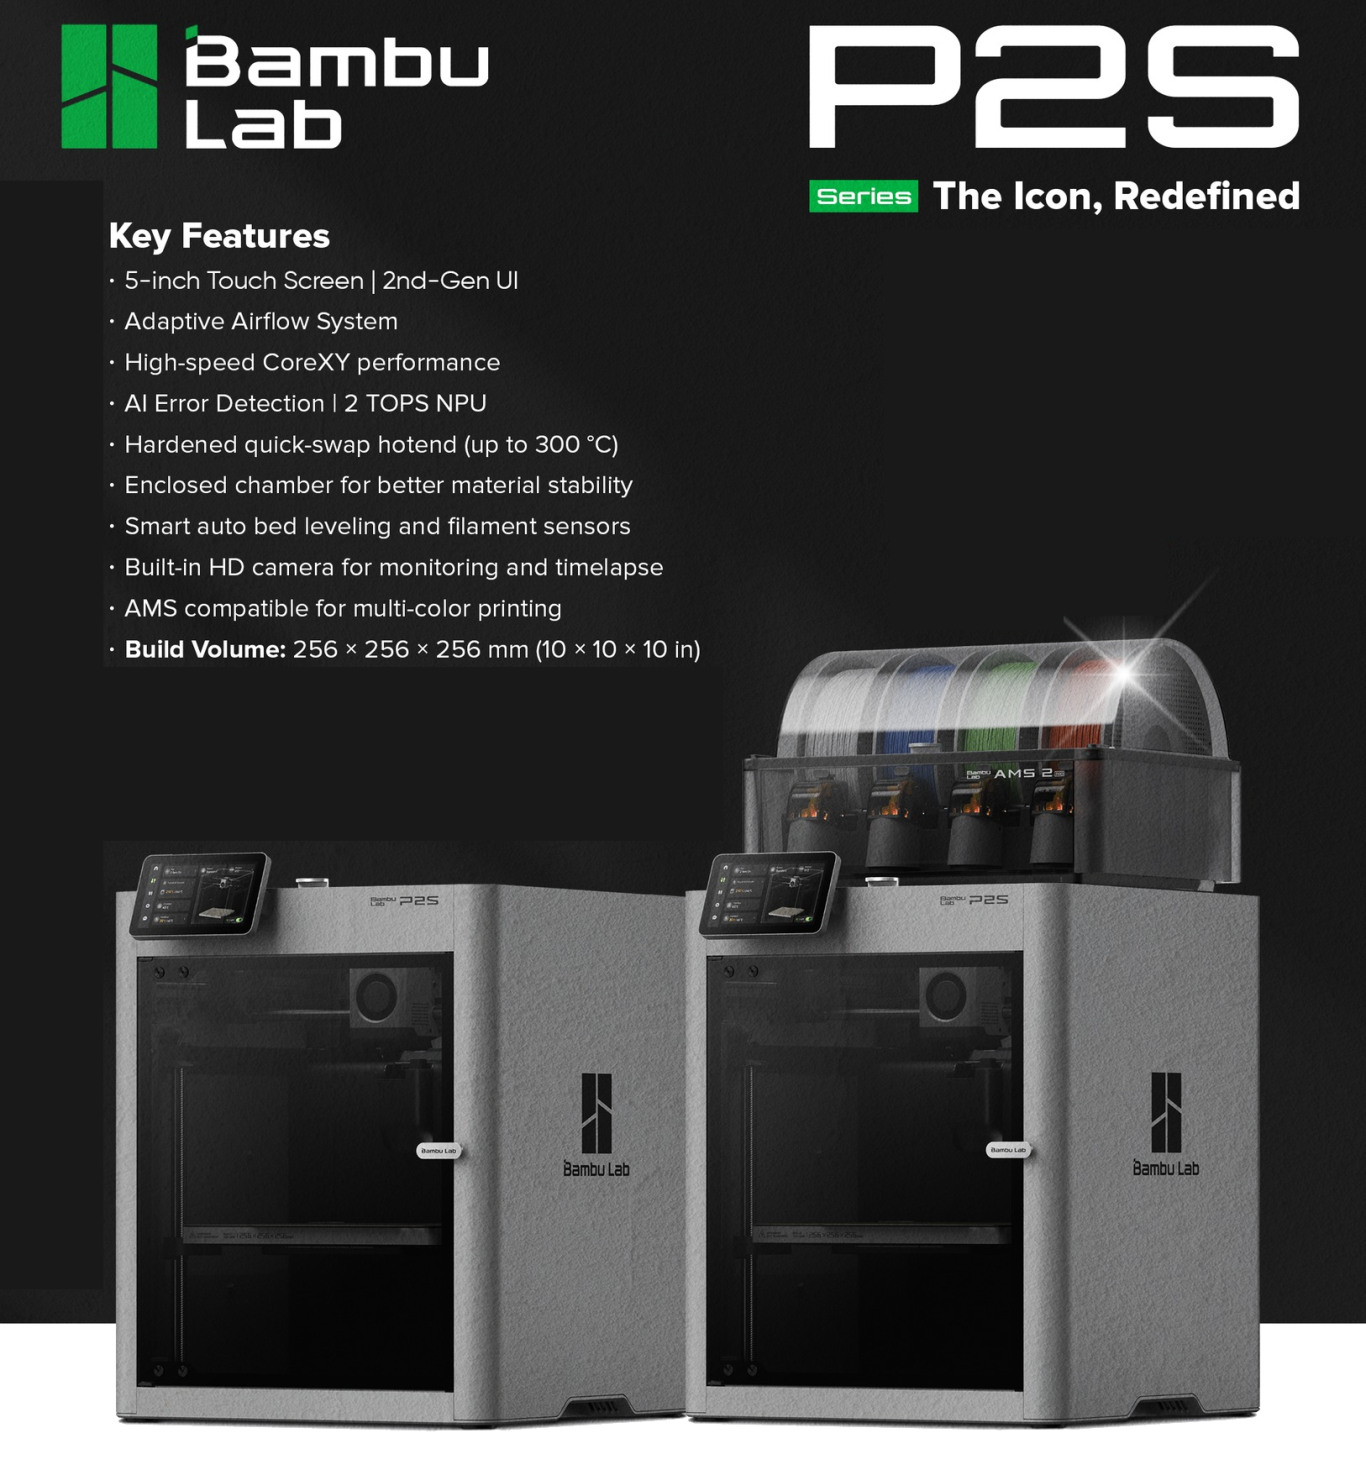
At ZinghDesign we can take care of making prototypes in house by using a Bambulab P2S 3D Printer which can make multi-color prototypes. Also handmade prototypes in wood. steel, cardboard, plastic is among the possibilties.
For bigger sizes or quanties, trial moulds or small series production moulds advice can be given of where to obtain these prototypes/products. This process can also be guided by ZinghDesign.
The files which are being used for the prototyping can also be used to inquire some mould quotations. In this way the several quotes can already be compared in an early stage.
4. FEA-FMEA-DFM Analysis
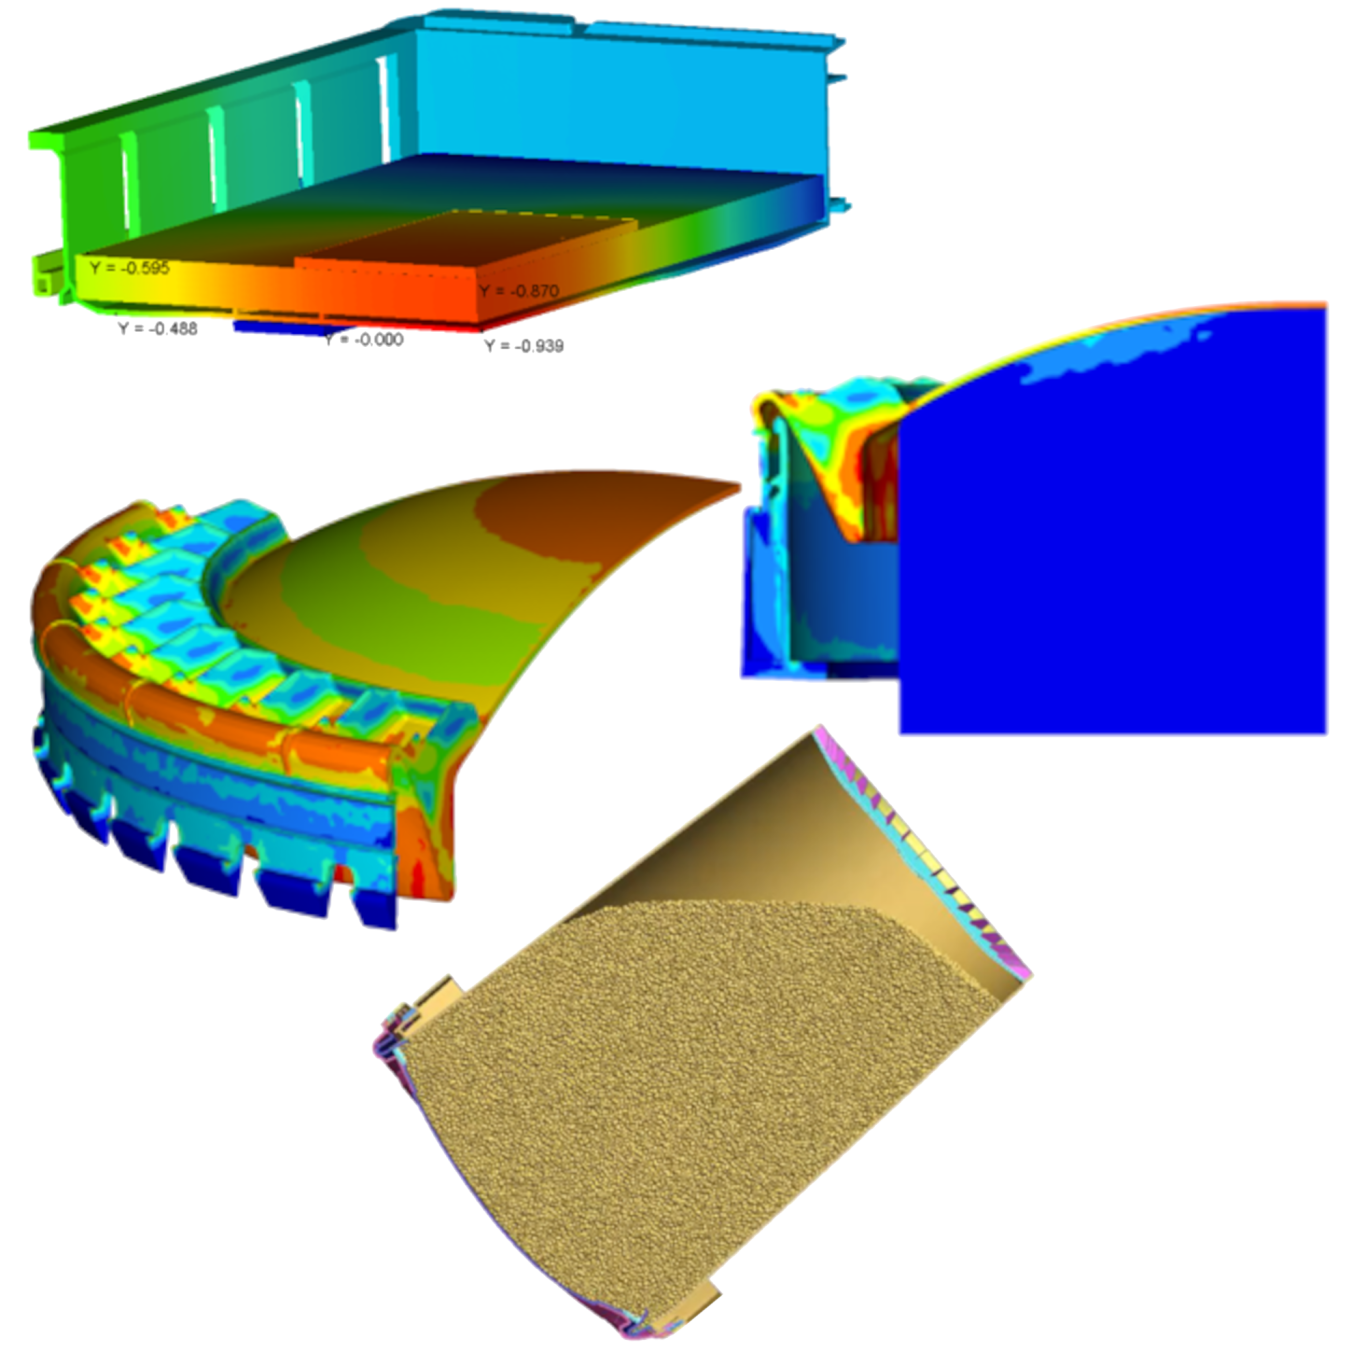
When the final concept is choosen and the List of Requirements is final several analysis can be done to make sure the product will fullfill these requirements . This is not only in functioning and strength but also how to produce the part(s) in the most effective cost efficient way.
Some early FEA analysis can be done in house but more complex analysis have to be outsourced to known companies who have done comparable sessions already several times with proven results.

5. CAD 3D Detailling
When the Proof of Concept and the corresponding strenght analysis are done then the 3D CAD files can be detailed out completely (incl. radii and draft angles). These files can then be send to the mouldmaker who can start with making first the lay-out of the mould. In this period some minor changes to the design can be done but as soon as the mouldmaker starts milling into the steel blocks this is not possible anymore.
6. QA Plan + 2D drawings
To make sure the quality can be guaranteed and monitored a QA plan has to be realised. In this QA-plan the general requirements are mentioned ( color, weight, material, wall thickness etc) . In this QA Plan there is also a list with tests with a detailled desciption of the quality requirements the product needs to fullfill. In this document the exact test are being described but also for example the safety factor and the values per test when it is a "pass" or "fail"

7. Production start-up
When the product is passing all the tests described in the QA-plan the customer has to sign off the part from the 1st trials after which the production can start. On the left there is a picture of the celebration of the production of the 1.000.000th shot of the lifting base tray which was designed by ZInghDesign (see also here: internal://185bb8cc-1d70-4ded-9462-8f49d9b23475 )
8. Patent application
During the development of the product it can be decided that it is worth to apply for a patent. ZinghDesign can take care of this process by getting in contact with the Patent Offices and ascociated lawyers. The documents needed ,like 2D line drawings and first drafts for the written claims which are the base of the patent to be applied ,can be delivererd also.